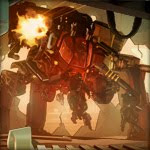
Ratio required: 2:1 or better
Typhon Groups:
Special:
Enraged phase when Typhon gets its health under 20%
Typhon forces uses:
6x Bossom Laser (24 avg dmg each one) Cannot be jammed.
6x Healing Units armored type (24 average heal each one). Can be jammed only with armor jams.
6x Concussion Drive robotic type. On proc (80%) jams one of your assault units. *If you place above your hitters your anti-armored units (Tridents, Alpha Mech, Quad Rovers) they will absorb the Concussion Drive’s jams. SO you don’t need really place Robotic jams into your Setup.
In enraged phase, Typhon increase its units by +2 (8 of each one)
In pre-enraged phase you need to jam its 6 armored healing units (Place Alpha Mech+ 8 Tridents or 12 Quad Rovers above your hitters. Then, the enemy jammers will remove only your own jammers instead your hitters)
In enraged phase you need jam 8 armored healing units. (Place Alpha Mech + 10 Tridents or 16 Quad Rovers above your hitters)
Obviously, the more jammers you place, the less damage you deal. SO you must follow a balance.
Using Apollo, Raid Lt. Emanuel and Daizon and Mobil Encampments can help you to remove healing power and save slots for more hitters (Anvils, etc)
But always, place at least 5 armor-jammers on top (pre-enrage phase) or 7 in enraged phase, so you can get profit on those units that will be jammed by the enemy Concussion Drives.
Loot Table:
64,000: 1 Typhon Token
157,000: 2 Typhon Tokens
251,000: 2 Typhon Tokens + 1 Fallen Prince Token
375,500: 3 Typhon Tokens + 1 Fallen Prince Token
501,000: 3 Typhon Tokens + 2 Fallen Prince Tokens
616,000: 5 Typhon Tokens + 2 Fallen Prince Tokens (Most efficient tier)
940,100: 7 Typhon Tokens + 2 Fallen Prince Tokens
940,100: 7 Typhon Tokens + 2 Fallen Prince Tokens
1,252,000: 7 Typhon Tokens + 4 Fallen Prince Tokens
1,563,000: 9 Typhon Tokens + 4 Fallen Prince Tokens
2,508,000: 9 Typhon Tokens + 6 Fallen Prince Tokens
Host Loot Table:
Host gets same tiers with a damage reduction of 250,000.

